Sunday, 25 September 2011

Mendel X-Axis Redesign

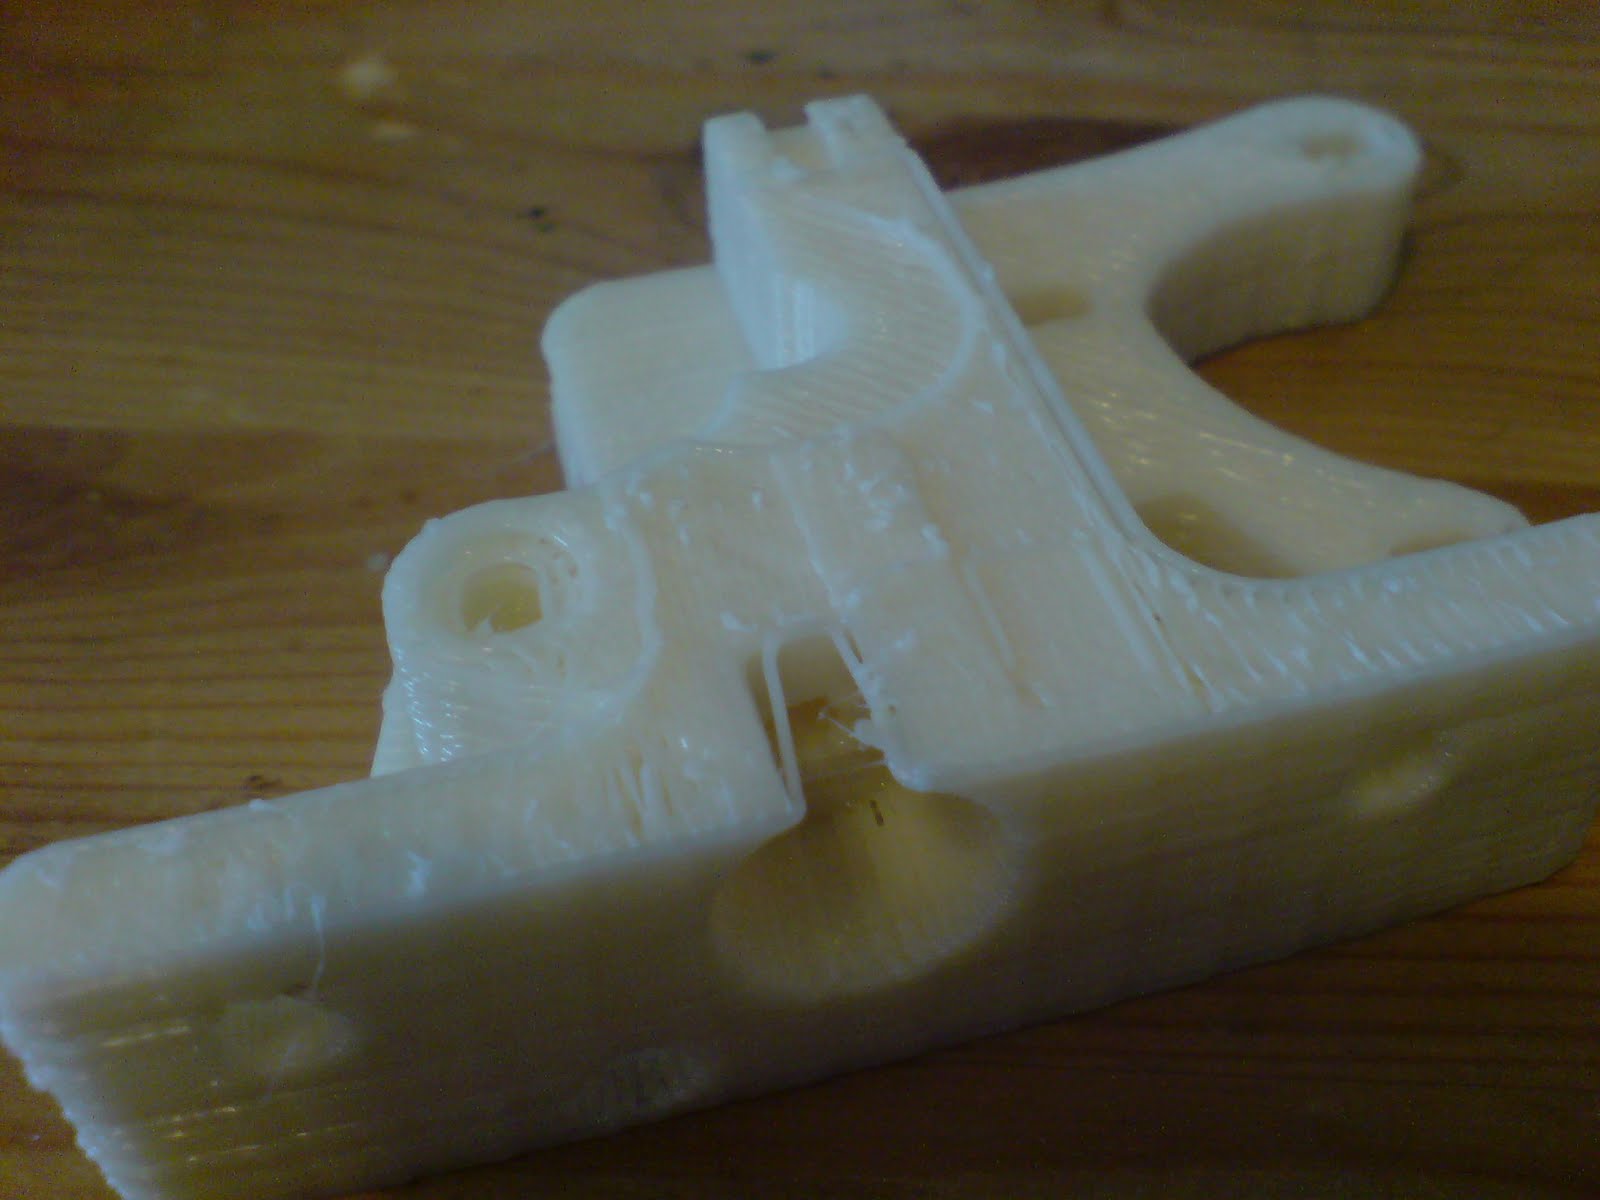
I was recently noticing a significant problem occurring in my prints referred to by makers as 'backlash', where some plastic deformation (permanent damage) or slack in the timing belts driving either of the X and Y axes, can lead to the extruder or printbed stopping at a slightly different real location for the same instruction, depending on which direction it moves there from.
This can be more technically termed a physical 'steady-state offset' in the way the extruder head, or any robotic part experiencing friction or loose parts for that matter, comes to rest after a movement.

Early indication: Note the ridges out of line on the near-left face; structurally insignificant here, but quite visible.

Tuesday, 23 August 2011

Why Didn't I Think of This Sooner?

Recently I'd been having an occasional problem when leaving my reprap unattended, especially if there was a big new reel of plastic on that barely fit, where the filament being unwound into the extruder would be close to the outer edge of my spool.
After a while of being pushed and pulled with the printhead movements, since the friction on the PLA bushings I used in the spool hub had such low friction, the filament would unwind itself loose enough for one loop to flop off one side of the spool, get caught on something and pull the extruder carriage to one side, skewing the whole piece being printed.

A lad on the reprap IRC channel going by the name DavideV tells me he uses some fancy piece of kitchenware called a Perfect Tear Paper Towel Holder to hold his spool, which apparently ratchets around in one direction providing some tension with a spring to stop kitchen paper rolls from unravelling. I looked around for other similar products to try and find a simple mechanism  that would keep my filament in place, and one was simply using this method of pressure:
SimpleHuman "Tension arm paper towel holder"
Which inspired me to create this:
My Bungee Cord Plastic Filament Retainer (BCPFR) needs to be on quite loose so that it doesn't create the same problem that it's intended to solve.
Glory be to the gaffer, the bungee and the methylated spirit, ramen.

Monday, 15 August 2011

Preventing Jams: Contradictory Constraints

Recently (okay, a couple weeks ago) after leaving my reprap printing while out buying food, I came home to find this calamity:
Extruder body print ended with some wispy filament and then a big gap of nothing.

Saturday, 23 July 2011

Series Heating and Other Developments

After a long break spent graduating, moving furniture into/around our flat, and lots of other such messing around, I finally got around to permanently solving my heated printbed problem, while getting a sturdy desk to set the printer on.

First of all, I had a problem with the way my heated-bed power-supply was connected, as the circuit was fixed with solder, that meant that the adapter block was physically connected to my reprap by its cable, and that I couldn't easily change it for another power supply.
My solution to the problem of wanting to quickly connect/disconnect a DC power supply was to take some bits of electrical screw-terminal:
sometimes referred to as a 'chocolate block' connector, cheap in long blocks
...and bolt it to one of Nicoll's bolted PLA bushings for Prusa Mendel.

Tuesday, 14 June 2011

Printing Prusa

After several prints using ABS, I can now safely say that this low-powered heated bed is capable of printing ABS parts under some stringent circumstances.

First of all, to reach this performance, I did my best to insulate the bottom surface of the aluminium plate, which so far has involved taping a couple of strips of a few more cotton wool pads underneath, and (I kid you not) stuffing an old worn out cotton sock and a bandana underneath to fill out some of the remaining space. If I had one big piece of cotton wool to fill the whole gap, it would probably work better, but I don't.

So, by pre-heating the bed either by covering it with something insulating on top (slow) or resting a clothes iron on top (fast) and bringing the temperature above 110C, I could print some small ABS parts on the bed, and larger ones with the aid of raft material.

Saturday, 11 June 2011

Testing ABS on Mendel Parts Heated Bed

It has been suggested that you can't print ABS on a RepRap Mendel built with the current kits supplied on mendelparts.com, since they include a power supply for the heated bed that only delivers 70W at the highest voltage, and that isn't enough to produce temperatures high enough to keep the parts stuck down.

Recently, I have been trying to challenge that claim with a few tests of my own. Firstly I taped some cotton wool under each of the heating resistors to provide a bit of insulation, hoping that would conserve some of the heat, and then pre-heated the printbed using an iron again, turning the thermostat up to the setting for cotton and leaving it for a few minutes, which brought the bed up to a temperature of around 110C.
Kapton tape hugs makeup removal pads over heating resistors under the printbed.

Wednesday, 8 June 2011

Quest To Use ABS

It's been a busy couple of weeks to say the least.
The design for my modular rotary hydroponic unit is now pretty much complete and ready for testing.
1 Ring with boards to support a PE sheet sump to hold mineral solution. Can be extended to more rings, and it has been suggested to use a stock drip-tray from garden stores underneath instead of hacking that sump together from scraps.
However, to start printing and testing parts for this, I really should be using ABS, not only for its superior strength to PLA, but because when being repeatedly dipped in a nutrient solution and stressed in a warm humid atmosphere, PLA could come under attack from microbes that would otherwise turn up to biodegrade it in a compost heap.